About
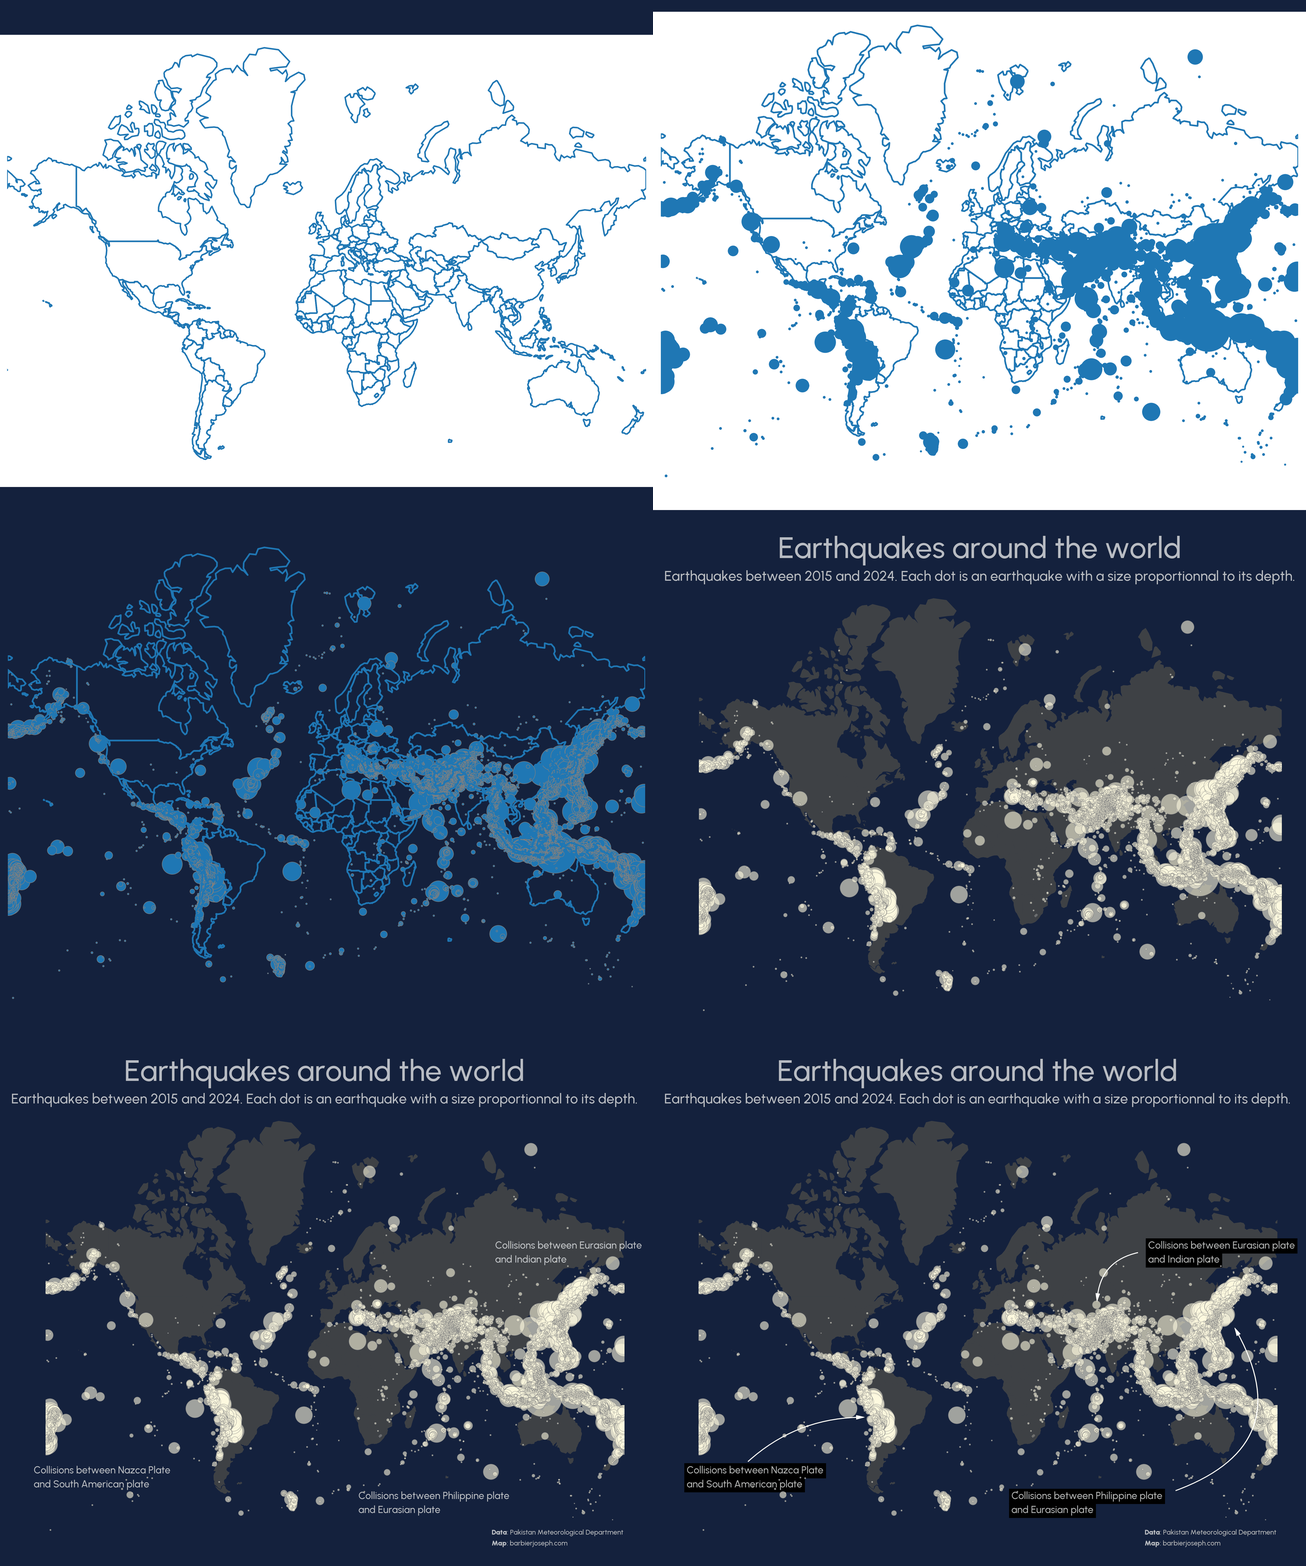
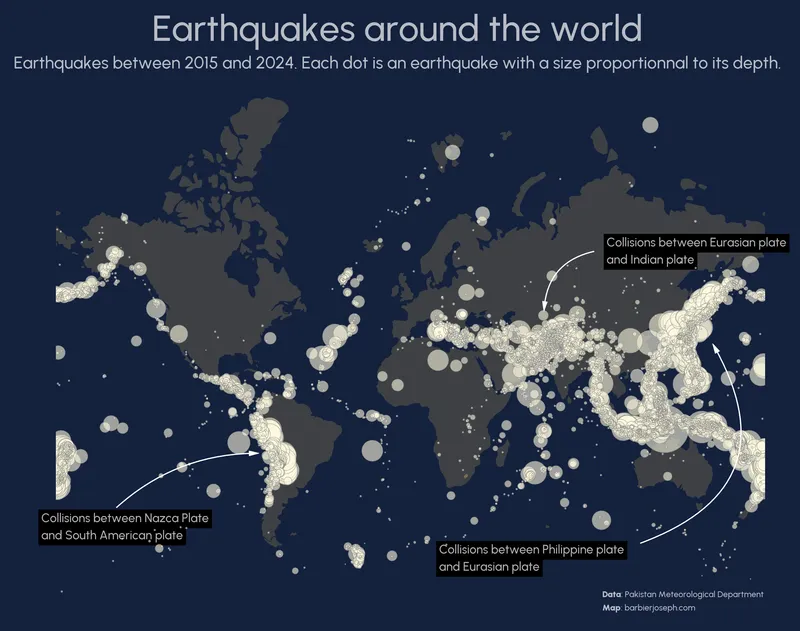
A bubble map is a map combined with a scatter plot where the size of each bubble corresponds to specific numerical values. In the example below, the map illustrates earthquake locations globally, with the bubble size representing their depth.
This chart has been created by Joseph Barbier. Thanks to him for accepting sharing its work here!
As a teaser, here is the plot we’re gonna try building:
Libraries
First, we need to install the following libraries:
- matplotlib and
geoplot: for creating the plot - pandas and
geopandas: for data manipulation - highlight_text: for annotations
geoplotandcartopyfor geospatial manipulation
# data manipulation
import numpy as np
import pandas as pd
import geopandas as gpd

# visualization
import matplotlib.pyplot as plt
from matplotlib import font_manager
from matplotlib.font_manager import FontProperties
from highlight_text import fig_text, ax_text
from matplotlib.patches import FancyArrowPatch

# geospatial manipulation
import cartopy.crs as ccrs
import cartopy.feature as cfeature
import geoplot
import geoplot.crs as gcrsDataset
In order to create a bubble map, we need 2 kind of datasets:
- a dataset with country shapes, that we load with the following code:
proj = ccrs.Mercator()

url = "https://raw.githubusercontent.com/holtzy/The-Python-Graph-Gallery/master/static/data/all_world.geojson"
world = gpd.read_file(url)
world = world[~world['name'].isin(["Antarctica", "Greenland"])]
world = world.to_crs(proj.proj4_init)
world.head()| name | geometry | |
|---|---|---|
| 0 | Fiji | MULTIPOLYGON (((20037508.343 -1800679.237, 200... |
| 1 | Tanzania | POLYGON ((3774143.866 -105050.440, 3792946.708... |
| 2 | W. Sahara | POLYGON ((-964649.018 3185897.152, -964597.245... |
| 3 | Canada | MULTIPOLYGON (((-13674486.249 6242596.000, -13... |
| 4 | United States of America | MULTIPOLYGON (((-13674486.249 6242596.000, -13... |
-
a dataset with latitude and longitude values, and another numerical column:
#Load data
url = "https://raw.githubusercontent.com/holtzy/The-Python-Graph-Gallery/master/static/data/earthquakes.csv"
df = pd.read_csv(url)

# Filter dataset: big earth quakes only
df = df[df['Depth (km)']>=0.01] # depth of at least 10 meters

# Sort: big bubbles must be below small bubbles for visibility
df.sort_values(by='Depth (km)', ascending=False, inplace=True)

df.head()| Date | Time (utc) | Region | Magnitude | Depth (km) | Latitude | Longitude | Mode | Map | year | |
|---|---|---|---|---|---|---|---|---|---|---|
| 7961 | 20/02/2019 | 06:50:47 | Banda Sea | 5.0 | 2026 | -6.89 | 129.15 | A | - | 2019.0 |
| 6813 | 07/07/2019 | 07:50:53 | Eastern New Guinea Reg, P.N.G. | 5.4 | 1010 | -5.96 | 147.90 | A | - | 2019.0 |
| 8293 | 17/01/2019 | 14:01:50 | Fiji Islands | 4.7 | 689 | -18.65 | 179.44 | A | - | 2019.0 |
| 11258 | 03/01/2018 | 06:42:58 | Fiji Islands Region | 5.5 | 677 | -19.93 | -178.89 | A | - | 2018.0 |
| 9530 | 06/09/2018 | 18:22:24 | Fiji Islands Region | 5.8 | 672 | -18.88 | 179.30 | A | - | 2018.0 |
Simple background map
We start this reproduction by creating the most simple background map possible. It only uses the world dataset:
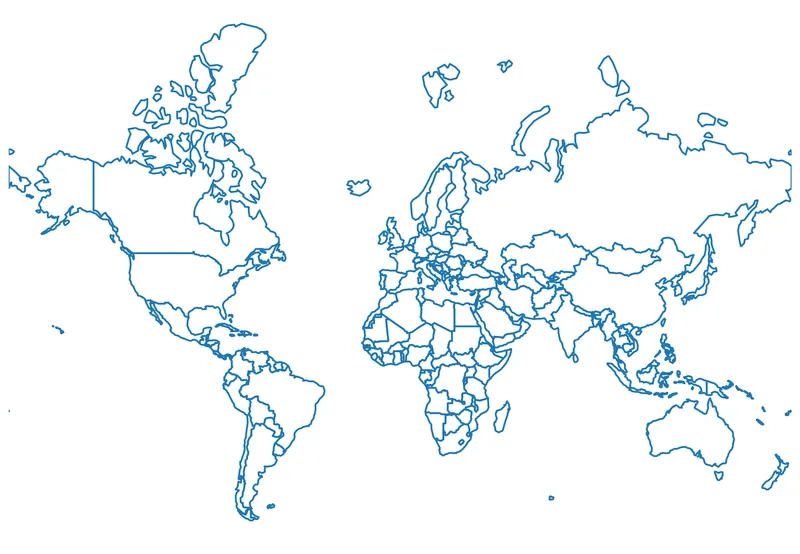
proj = ccrs.Mercator()
fig, ax = plt.subplots(figsize=(12, 8), dpi=300, subplot_kw={'projection':proj})
ax.set_axis_off()

# background map
world.boundary.plot(ax=ax)

plt.show()Bubble map
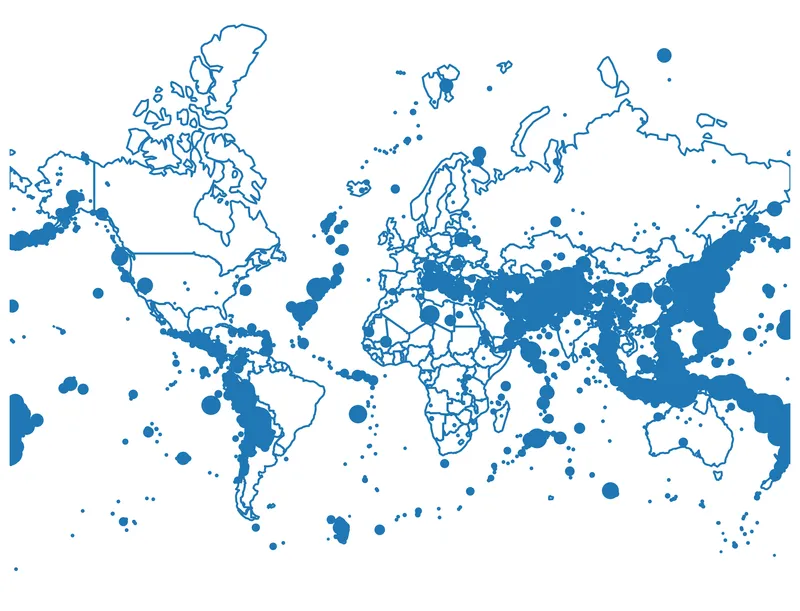
The next step is to add earthquakes (bubbles) on the map.
For this, we need to transform the latitude and longitude into the choosen projection (defined with proj) using the transform_points() function. Once we have done so, we just use the scatter() function from matplotlib:
proj = ccrs.Mercator()
fig, ax = plt.subplots(figsize=(12, 8), dpi=300, subplot_kw={'projection':proj})
ax.set_axis_off()

# background map
world.boundary.plot(ax=ax)

# transform the coordinates to the projection's CRS
pc = ccrs.PlateCarree()
new_coords = proj.transform_points(pc, df['Longitude'].values, df['Latitude'].values)

# bubble on top of the map
ax.scatter(
   new_coords[:, 0], new_coords[:, 1],
   s=df['Depth (km)']/3, # size of the bubbles
   zorder=10, # this specifies to put bubbles on top of the map
)

plt.show()Customize colors
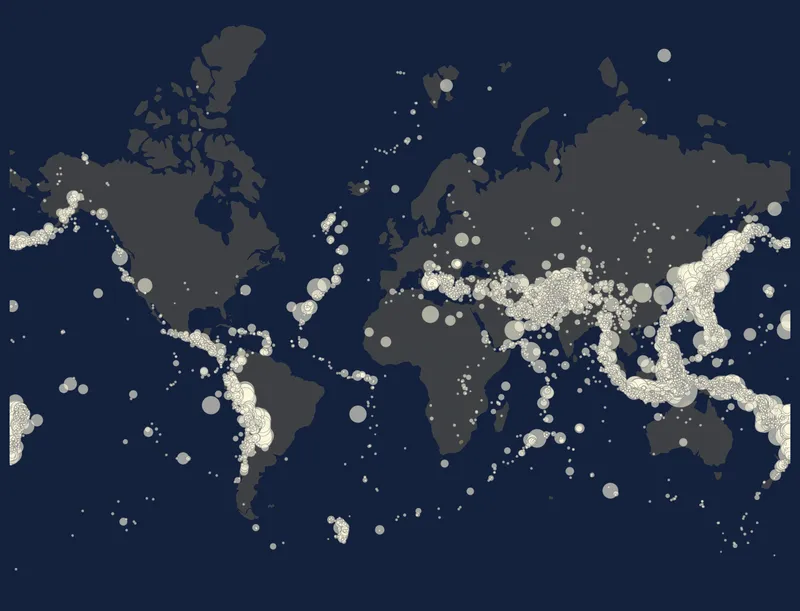
Now that the base of the map is here, we want to give it a better style. For this, we:
- change backround color with the
set_facecolor()function - change bubble color with the
colorargument - change map edge colors with the
edgecolorargument
# colors
background_color = '#14213d'
map_color = (233/255, 196/255, 106/255, 0.2)
bubble_color = '#fefae0'

# initialize the figure
proj = ccrs.Mercator()
fig, ax = plt.subplots(figsize=(12, 8), dpi=300, subplot_kw={'projection':proj})
fig.set_facecolor(background_color)
ax.set_facecolor(background_color)
ax.set_axis_off()

# background map
world.boundary.plot(ax=ax, linewidth=0, facecolor=map_color)

# transform the coordinates to the projection's CRS
pc = ccrs.PlateCarree()
new_coords = proj.transform_points(pc, df['Longitude'].values, df['Latitude'].values)

# bubble on top of the map
ax.scatter(
   new_coords[:, 0], new_coords[:, 1],
   s=df['Depth (km)']/3,
   color=bubble_color,
   linewidth=0.4,
   edgecolor='grey',
   alpha=0.6,
   zorder=10,
)

plt.show()Title and description
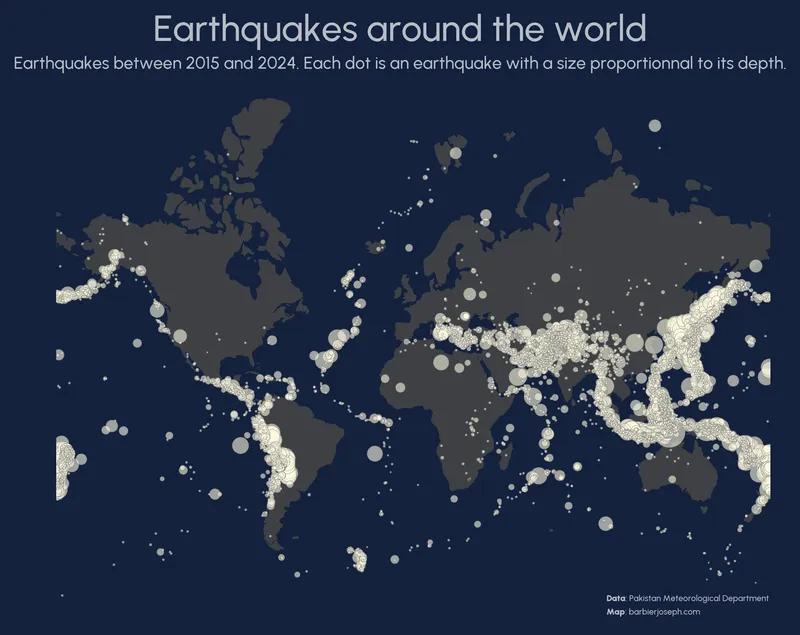
Since the default font isn't very attractive, we load another font: for the title and the annotations. We can then use the fig_text() function from the highlight_text library to add annotations to the map. Check out this post to learn how to use custom fonts in matplotlib.
# colors
background_color = '#14213d'
map_color = (233/255, 196/255, 106/255, 0.2)
text_color = 'white'
bubble_color = '#fefae0'
alpha_text = 0.7

# !!! change it to your path
personal_path = '/Users/josephbarbier/Library/Fonts/'
font_path = personal_path + 'Urbanist-Medium.ttf'
font = FontProperties(fname=font_path)
font_path = personal_path + 'Urbanist-Black.ttf'
bold_font = FontProperties(fname=font_path)

# initialize the figure
fig, ax = plt.subplots(figsize=(12, 8), dpi=300, subplot_kw={'projection':proj})
fig.set_facecolor(background_color)
ax.set_facecolor(background_color)
ax.set_axis_off()

# background map
world.boundary.plot(ax=ax, linewidth=0, facecolor=map_color)

# transform the coordinates to the projection's CRS
pc = ccrs.PlateCarree()
new_coords = proj.transform_points(pc, df['Longitude'].values, df['Latitude'].values)

# bubble on top of the map
ax.scatter(
   new_coords[:, 0], new_coords[:, 1],
   s=df['Depth (km)']/3,
   color=bubble_color,
   linewidth=0.4,
   edgecolor='grey',
   alpha=0.6,
   zorder=10,
)

# title
fig_text(
   x=0.5, y=0.98, s='Earthquakes around the world',
   color=text_color, fontsize=30, ha='center', va='top', font=font,
   alpha=alpha_text
)

# subtitle
fig_text(
   x=0.5, y=0.92, s='Earthquakes between 2015 and 2024. Each dot is an earthquake with a size proportionnal to its depth.',
   color=text_color, fontsize=14, ha='center', va='top', font=font, alpha=alpha_text
)

# credit
text = """
<Data>: Pakistan Meteorological Department
<Map>: barbierjoseph.com
"""
fig_text(
   x=0.85, y=0.16, s=text, color=text_color, fontsize=7, ha='right', va='top',
   font=font, highlight_textprops=[{'font': bold_font}, {'font': bold_font}],
   alpha=alpha_text
)

plt.show()Arrows and annotations
Same as title and description: we use the fig_text() function from the highlight_text library to add the annotation.
The arrow is added using the draw_arrow() function defined below. It uses the FancyArrowPatch class from the matplotlib.patches module.
def draw_arrow(tail_position, head_position, invert=False, radius=0.5, color='black', fig=None):
   if fig is None:
      fig = plt.gcf()
   kw = dict(arrowstyle="Simple, tail_width=0.5, head_width=4, head_length=8", color=color, lw=0.5)
   if invert:
      connectionstyle = f"arc3,rad=-{radius}"
   else:
      connectionstyle = f"arc3,rad={radius}"
   a = FancyArrowPatch(
      tail_position, head_position,
      connectionstyle=connectionstyle,
      transform=fig.transFigure,
      **kw
   )
   fig.patches.append(a)

# !!! change it to your path
personal_path = '/Users/josephbarbier/Library/Fonts/'
font_path = personal_path + 'Urbanist-Medium.ttf'
font = FontProperties(fname=font_path)
font_path = personal_path + 'Urbanist-Black.ttf'
bold_font = FontProperties(fname=font_path)

# colors
background_color = '#14213d'
map_color = (233/255, 196/255, 106/255, 0.2)
text_color = 'white'
bubble_color = '#fefae0'
alpha_text = 0.7

# initialize the figure
fig, ax = plt.subplots(figsize=(12, 8), dpi=300, subplot_kw={'projection': proj})
fig.set_facecolor(background_color)
ax.set_facecolor(background_color)
ax.set_axis_off()

# background map
world.boundary.plot(ax=ax, linewidth=0, facecolor=map_color)

# transform the coordinates to the projection's CRS
pc = ccrs.PlateCarree()
new_coords = proj.transform_points(pc, df['Longitude'].values, df['Latitude'].values)

# bubble on top of the map
ax.scatter(
   new_coords[:, 0], new_coords[:, 1],
   s=df['Depth (km)'] * np.log(df['Depth (km)']) /10,
   color=bubble_color,
   linewidth=0.4,
   edgecolor='grey',
   alpha=0.6,
   zorder=10,
)

# title
fig_text(
   x=0.5, y=0.98, s='Earthquakes around the world',
   color=text_color, fontsize=30, ha='center', va='top', font=font,
   alpha=alpha_text
)

# subtitle
fig_text(
   x=0.5, y=0.92, s='Earthquakes between 2015 and 2024. Each dot is an earthquake with a size proportionnal to its depth.',
   color=text_color, fontsize=14, ha='center', va='top', font=font, alpha=alpha_text
)

# credit
text = """
<Data>: Pakistan Meteorological Department
<Map>: barbierjoseph.com
"""
fig_text(
   x=0.85, y=0.16, s=text, color=text_color, fontsize=7, ha='right', va='top',
   font=font, highlight_textprops=[{'font': bold_font}, {'font': bold_font}],
   alpha=alpha_text
)

# nazaca plate
highlight_textprops = [
   {"bbox": {"facecolor": "black", "pad": 2, "alpha": 1}, "alpha": alpha_text},
   {"bbox": {"facecolor": "black", "pad": 2, "alpha": 1}, "alpha": alpha_text}
]
draw_arrow((0.23, 0.27), (0.37, 0.35), fig=fig, color=text_color, invert=True, radius=0.2)
fig_text(x=0.16, y=0.265, s='<Collisions between Nazca Plate>\n<and South American plate>', fontsize=10, color=text_color, font=font, highlight_textprops=highlight_textprops, zorder=100)

# india plate
draw_arrow((0.69, 0.64), (0.64, 0.55), fig=fig, color=text_color, radius=0.4)
fig_text(x=0.7, y=0.66, s='<Collisions between Eurasian plate>\n<and Indian plate>', fontsize=10, color=text_color, font=font, highlight_textprops=highlight_textprops, zorder=100)

# philippine plate
draw_arrow((0.73, 0.22), (0.8, 0.51), fig=fig, color=text_color, radius=0.6)
fig_text(x=0.54, y=0.22, s='<Collisions between Philippine plate>\n<and Eurasian plate>', fontsize=10, color=text_color, font=font, highlight_textprops=highlight_textprops, zorder=100)

plt.savefig('../../static/graph/web-bubble-map-with-arrows.png', dpi=300, bbox_inches="tight")
plt.show()Going further
You might be interested in:
- the bubble map section of the gallery
- how to create arrow with an inflexion point in a plot
- how to use the highlight_text package to add annotations to a plot
- how to create cartograms
- this very good looking choropleth map