Libraries
The easiest way to create calendar heatmaps is to use the dayplot library, which is based on matplotlib.
import matplotlib.pyplot as plt
import dayplot as dp
Install with pip install dayplot requests pandas. Note that pandas and requests are only required to load the built-in dataset, used below.
If you don't need it, just use: pip install dayplot
Dataset
dayplot provides a built-in dataset with simple features, that we can access with:
df = dp.load_dataset()
df
| dates | values | |
|---|---|---|
| 0 | 2024-06-17 | 3 |
| 1 | 2024-08-22 | 4 |
| 2 | 2024-04-03 | 1 |
| 3 | 2024-09-20 | 5 |
| 4 | 2024-05-22 | 5 |
| ... | ... | ... |
| 495 | 2025-07-27 | 6 |
| 496 | 2025-03-26 | 6 |
| 497 | 2025-05-12 | 5 |
| 498 | 2025-11-13 | 5 |
| 499 | 2025-12-14 | 2 |
500 rows × 2 columns
Quick start
The easiest way to create your first calendar heatmap is to call the calendar() function, with the following argument:
dates: a list of datesvalues: value for each datestart_date: when should the calendar heatmap start?end_date: when should the calendar heatmap end?ax: the matplotlib Axes to use. Optionnal but recommended to avoid unexpected results.
fig, ax = plt.subplots(figsize=(15, 6), dpi=300)
dp.calendar(
    dates=df["dates"],
    values=df["values"],
    start_date="2024-01-01",
    end_date="2024-12-31",
    ax=ax,
)
plt.show()
Colors
Colormap
All colormap from matplotlib, or any colormap you might have created (using pypalettes or manually with a LinearSegmentedColormap object) can be used to change the colormap
fig, ax = plt.subplots(figsize=(15, 6), dpi=300)
dp.calendar(
    dates=df["dates"],
    values=df["values"],
    start_date="2024-01-01",
    end_date="2024-12-31",
    cmap="Reds",  # red-ish colormap
    ax=ax,
)
plt.show()

You can also control the range of the colormap with vmin, vmax and vcenter. Those can be important arguments as they control how the colormap behaves depending on the values.
fig, ax = plt.subplots(figsize=(15, 6), dpi=300)
dp.calendar(
    dates=df["dates"],
    values=df["values"],
    start_date="2024-01-01",
    end_date="2024-12-31",
    cmap="Reds",
    vmin=2,
    vcenter=3,
    vmax=10,
    ax=ax,
)
plt.show()

Color for missing values
By default, dates with no values are lightgrey, but we can change that with the color_for_none argument:
fig, ax = plt.subplots(figsize=(15, 6), dpi=300)
dp.calendar(
    dates=df["dates"],
    values=df["values"],
    start_date="2024-01-01",
    end_date="2024-12-31",
    color_for_none="skyblue",  # light blue color
    ax=ax,
)
plt.show()

Edgecolor
fig, ax = plt.subplots(figsize=(15, 6), dpi=300)
dp.calendar(
    dates=df["dates"],
    values=df["values"],
    start_date="2024-01-01",
    end_date="2024-12-31",
    edgecolor="black",  # black egdecolor
    edgewidth=1,  # required to make the edges visible
    mutation_scale=0.8,  # smaller boxes
    ax=ax,
)
plt.show()

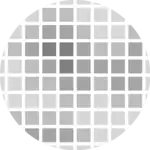
Boxstyle
By default, dayplot draws square, but we can easily change it with the boxstyle argument:
fig, ax = plt.subplots(figsize=(15, 6), dpi=300)
dp.calendar(
    dates=df["dates"],
    values=df["values"],
    start_date="2024-01-01",
    end_date="2024-12-31",
    boxstyle="circle",  # circle
    ax=ax,
)
plt.show()

fig, ax = plt.subplots(figsize=(15, 6), dpi=300)
dp.calendar(
    dates=df["dates"],
    values=df["values"],
    start_date="2024-01-01",
    end_date="2024-12-31",
    boxstyle="round",  # round
    ax=ax,
)
plt.show()

fig, ax = plt.subplots(figsize=(15, 6), dpi=300)
dp.calendar(
    dates=df["dates"],
    values=df["values"],
    start_date="2024-01-01",
    end_date="2024-12-31",
    boxstyle="sawtooth",  # sawtooth
    ax=ax,
)
plt.show()
Multiple years
dayplot draws the calendar heatmap on a matplotlib Axes (or subplot, if you prefer).
This gives full control in the layout of the final chart. For example, in order to plot 2 calendar heatmaps on top of each other, we just have to create a Figure with 2 Axes:
fig, (ax1, ax2) = plt.subplots(nrows=2, figsize=(16, 4), dpi=300)

# 2025 heatmap
dp.calendar(
    dates=df["dates"],
    values=df["values"],
    start_date="2025-01-01",
    end_date="2025-12-31",
    cmap="Blues",
    ax=ax1,  # top axes
)

# 2024 heatmap
dp.calendar(
    dates=df["dates"],
    values=df["values"],
    start_date="2024-01-01",
    end_date="2024-12-31",
    cmap="Blues",
    ax=ax2,  # bottom axes
)

plt.show()
In order to make it obvious which year is which heatmap, let's add labels:
fig, (ax1, ax2) = plt.subplots(nrows=2, figsize=(16, 4), dpi=300)

# 2025 heatmap
dp.calendar(
    dates=df["dates"],
    values=df["values"],
    start_date="2025-01-01",
    end_date="2025-12-31",
    cmap="Blues",
    ax=ax1,  # top axes
)

# 2024 heatmap
dp.calendar(
    dates=df["dates"],
    values=df["values"],
    start_date="2024-01-01",
    end_date="2024-12-31",
    cmap="Blues",
    ax=ax2,  # bottom axes
)

# labels
text_args = dict(x=-4, y=3.5, size=30, rotation=90, color="#aaa", va="center")
ax1.text(s="2025", **text_args)
ax2.text(s="2024", **text_args)

plt.show()