Libraries & Dataset
Let's start by import a few libraries and create a dataset:
# libraries
import matplotlib.pyplot as plt
import numpy as np
import pandas as pd

# create data
size = 100000
df = pd.DataFrame({
   'x': np.random.normal(size=size),
   'y': np.random.normal(size=size)
})
df.head()| x | y | |
|---|---|---|
| 0 | 0.156635 | 0.497530 |
| 1 | -0.485384 | -1.329300 |
| 2 | -1.116573 | 1.873535 |
| 3 | 0.841880 | 0.375499 |
| 4 | -0.528407 | -1.696453 |
2D histograms
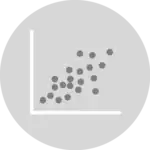
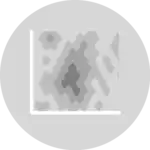
2D histograms are useful when you need to analyse the relationship between 2 numerical variables that have a huge number of values. It is useful for avoiding the over-plotted scatterplots.
The following example illustrates the importance of the bins argument. You can explicitly tell how many bins you want for the X and the Y axis.
The parameters of hist2d() function used in the example are:
x, y: input valuesbins: the number of bins in each dimensioncmap: colormap
fig, axs = plt.subplots(nrows=2, ncols=2, figsize=(8,8))

# Big bins
axs[0,0].hist2d(x, y, bins=(50, 50), cmap=plt.cm.jet)
axs[0, 0].set_title('bins = (50, 50)')

# Small bins
axs[0,1].hist2d(x, y, bins=(600, 600), cmap=plt.cm.jet)
axs[0, 1].set_title('bins = (600, 600)')

# If you do not set the same values for X and Y, the bins won't be a square!
axs[1,0].hist2d(x, y, bins=(600, 30), cmap=plt.cm.jet)
axs[1, 0].set_title('bins = (600, 30)')

# If you do not set the same values for X and Y, the bins won't be a square!
axs[1,1].hist2d(x, y, bins=(30, 600), cmap=plt.cm.jet)
axs[1, 1].set_title('bins = (30, 600)')

plt.show()
Colors
Once you decide the bin size, it is possible to change the colour palette. Matplolib provides a whole bunch of pre-defined color map (also know as cmap).
Here you can find how to use them in a 2d histogram:
fig, axs = plt.subplots(nrows=2, ncols=2, figsize=(8,8))

# Big bins
axs[0,0].hist2d(x, y, bins=(50, 50), cmap=plt.cm.Reds_r)
axs[0, 0].set_title('cmap=plt.cm.Reds')

# Small bins
axs[0,1].hist2d(x, y, bins=(50, 50), cmap=plt.cm.Blues_r)
axs[0, 1].set_title('cmap=plt.cm.Blues')

# If you do not set the same values for X and Y, the bins won't be a square!
axs[1,0].hist2d(x, y, bins=(50, 50), cmap=plt.cm.Greens_r)
axs[1, 0].set_title('cmap=plt.cm.Greens')

# If you do not set the same values for X and Y, the bins won't be a square!
axs[1,1].hist2d(x, y, bins=(50, 50), cmap=plt.cm.Greys_r)
axs[1, 1].set_title('cmap=plt.cm.Greys')

plt.show()
Colorbar
Finally, it might be useful to add a color bar on the side as a legend. You can add a color bar using colorbar() function.
plt.hist2d(x, y, bins=(50, 50), cmap=plt.cm.Greys_r)
plt.colorbar()
plt.show()
Going further
You might be interested:
- how to create a contour plot, which is a smoothed version of the 2d histogram
- how to combine a 2d density/histogram plot with marginal plot